Guidance & Support
Installing ...
... is straight forward. Download the installer, run it, and you are done. Don't be afraid: There is only one download and only one setup to run.
Using...
We attach great importance to make our products as intuitive to use and platform complaint as possible. However you need help?
Help to help yourself...
Please be aware that we continuously extend and bugfix our software. So when you are still facing problems although you have the latest updates installed, please read along
our troubleshooting step-by-step guidance.
In any other case feel free to contact us!
Install binary Leaf printer
Downloading binary Leaf printer
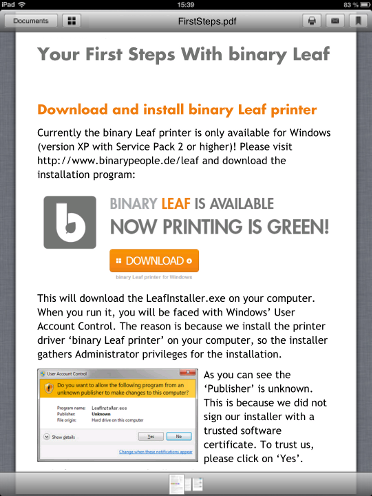
When you installed the binary Leaf App on your tablet or handset device, you also need to install the binary Leaf printer on your Windows computer. Currently the binary Leaf printer is only available for Windows XP (with Service Pack 2) or higher! We plan a version for Mac OS X in the near future!On our 'Home' side you can find the download link for the binary Leaf printer:
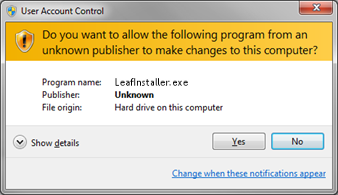
As you can see the Publisher is unknown. This is because we did not sign our installer with a trusted software certificate. To trust us, please click on 'Yes'.
Starting the binary Leaf Installer
When you run 'LeafInstaller.exe' installation program will show up. If you like you can change the installation path. To initiate the installation just drag & drop the icon of binary Leaf out of the box onto the desktop – as shown by the red arrow: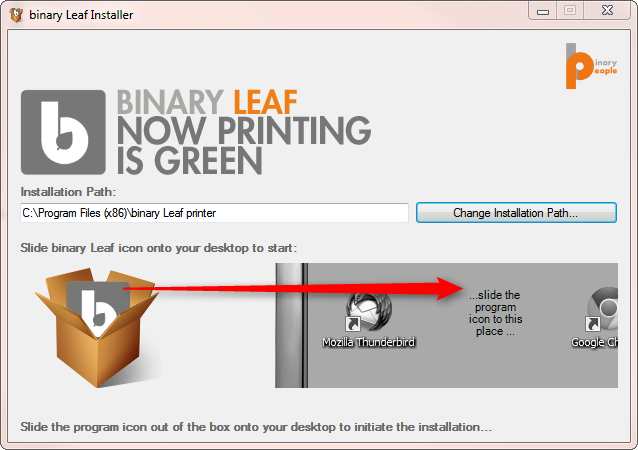
- our binary Leaf printer setup
- Apple's Bonjour setup (required 3rd party component)
- Artifex' Ghostscript setup (required 3rd party component)
How to use binary Leaf printer
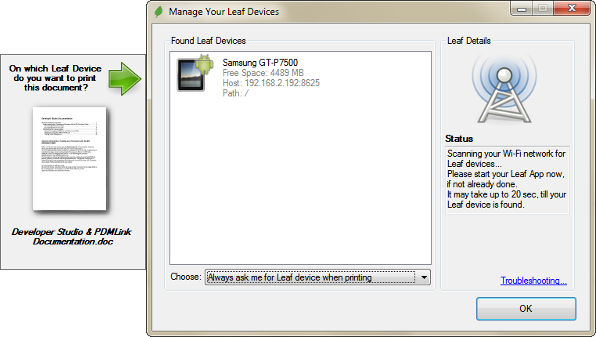
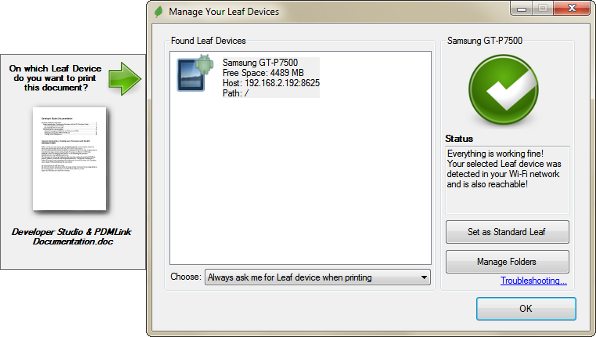
When you initiated a print, this additional tool will show up to give to the opportunity to select and/or manage your mobile device (by setting the standard destination folder for your printouts for example).
As long as you do not have a mobile device with a running binary Leaf App you will see an empty list view:
 button. This makes sense if you have
only one device in use.
button. This makes sense if you have
only one device in use.Secondly you can manage your folders. Click on the
 button and it brings
up the dialog for managing your folders:
button and it brings
up the dialog for managing your folders: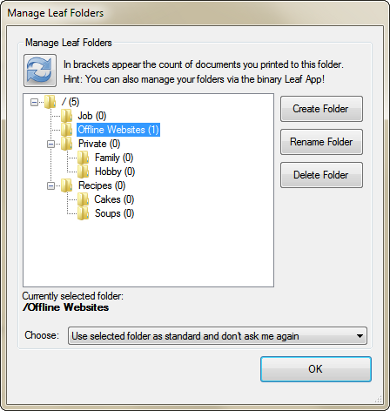
You can also find this tool in your Windows start menu:

How to use the iOS App
Further below you can read about how to:
Folder Management
By tapping on the in the upper left, you open the Document Browser:
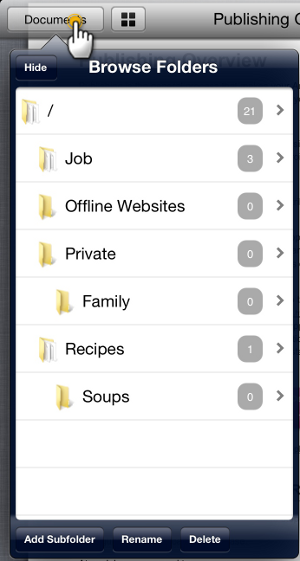
 with the count of the containing print-outs on its
very right.
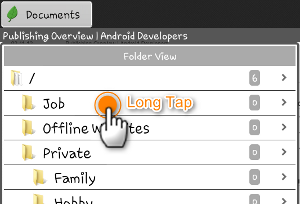
with the count of the containing print-outs on its
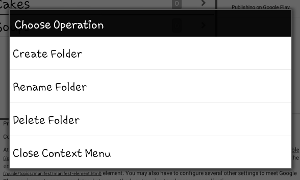
very right.With a long tap on a folder you can open up the context menu that offers you the actions you can perform on this folder.
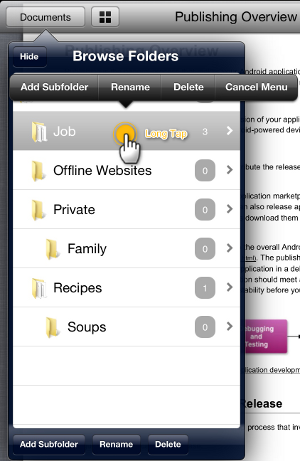
You can also add new subfolders, edit or delete exising ones by tapping on one of these buttons:

When you tap on
 , the Document Browser will change its appearance:
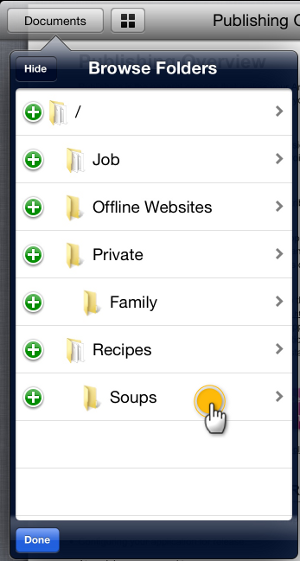
When you now tap on a folder item you are able to assign the name of the new subfolder:
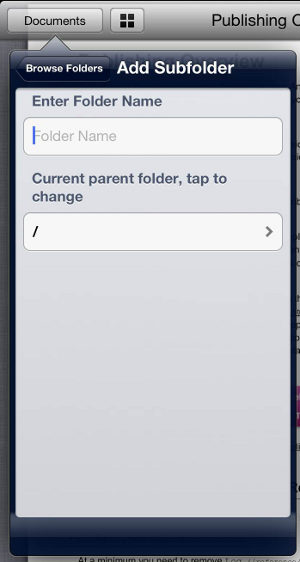
When completed, tap on
 to quite the edit mode.
When you tap on
 , the Document Browser will change its appearance to:
When you now tap on a folder item you are able to rename the subfolder:
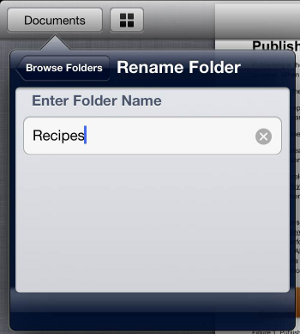
When you tap on
 , the Document Browser will change its appearance to:
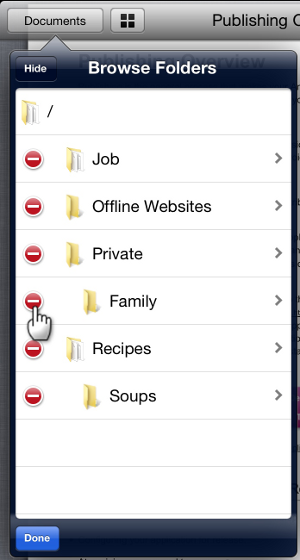
By tapping on the
 will show up a red delete button you have to tap for confirmation:
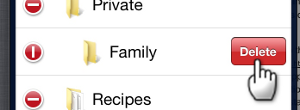
Please note that only empty folders can be removed!
When completed, tap on
to quite the edit mode.Manage your print-outs
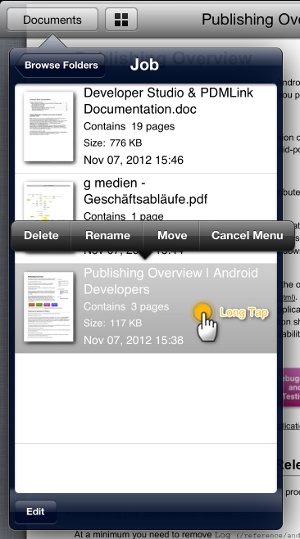
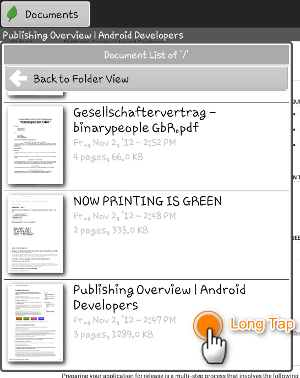
When you tap on a folder item the Document Browser will show your containing print-outs. Tap on an item to open the according print-out.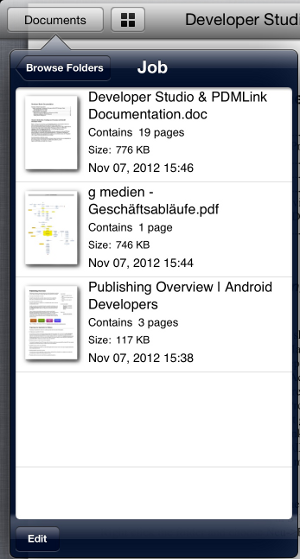
On the left you always find the thumbnail of the first page, then some information about the document itself.
By tapping on the
 button you get back to the folder overview again.
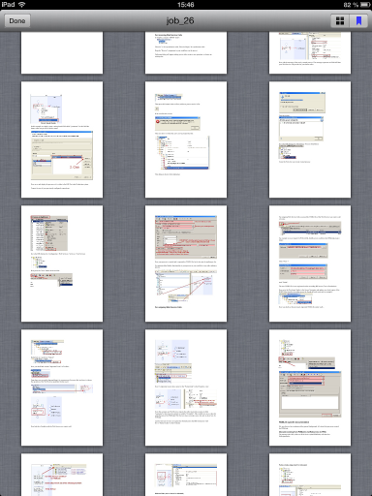
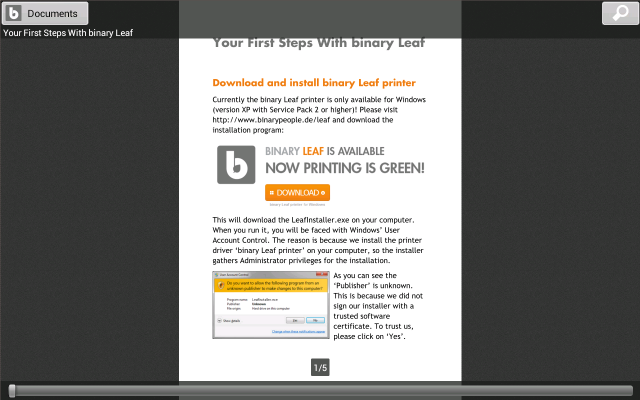
Tap on a document to view it! You now can scroll through the sides by either tapping on the left or right border of the view port, or by sliding with your finger:
 button. Pressing it sets the list view in the edit mode.
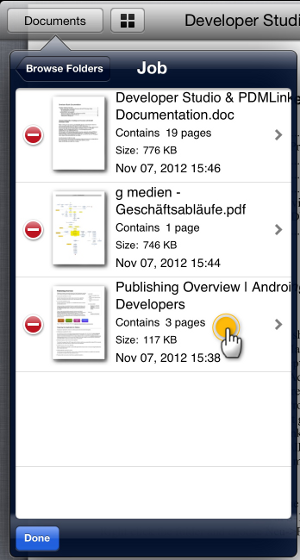
Tapping on the item itself will allow you to rename it:
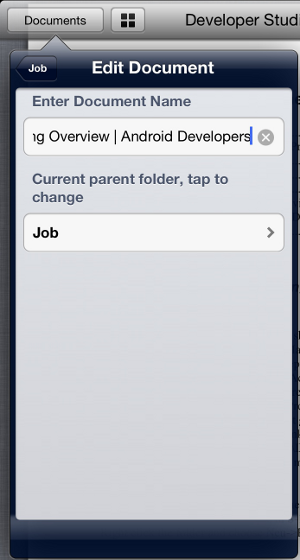
Tap on
 to move the document respectively change the parent folder:
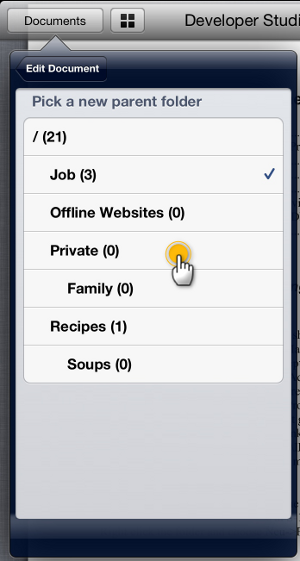
For example, tapping the ‘Private’ folder, will move the document to this folder.
When completed, tap on
to quite the edit mode.Tapping on the
will ask you for your confirmation (red delete button):
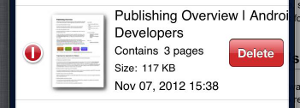
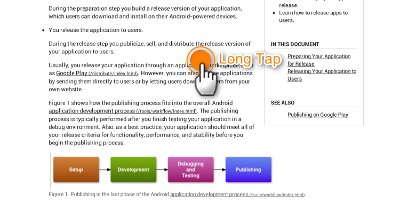
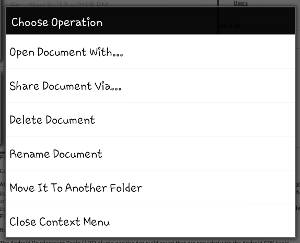
Again, you can reach the context menu by long-tapping on a print-out item with all available operations.
How to use the Android App
Further below you can read about how to:
Folder Management
By tapping on the in the upper left, you open the Document Browser:
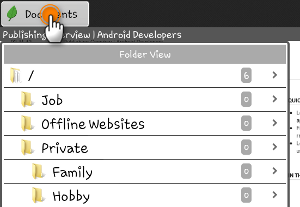 with the count of the containing print-outs on its
very right.
with the count of the containing print-outs on its
very right.With a long tap on a folder
Manage your print-outs
When you tap on a folder, the containing printed documents will appear. On the left you have a thumbnail of the first page. Then some information about the document itself. On top of the list there is the that brings you back to the folder view.
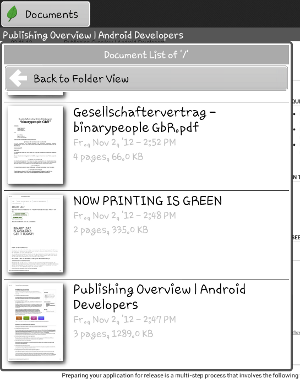
Troubleshooting
Your device is not found
If your device still does not appear in the settings application, please do the following steps:- Check your device is connected to same Wi-Fi network your Windows desktop computer is.
- Be sure that you have the latest versions installed.
- Restart the App on your device.
- Restart your print.
- Restart the Bonjour system service.
- Restart your computer.
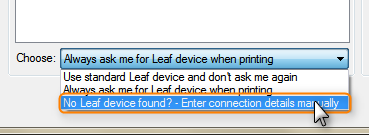
- Enter the connection details manually (see below).
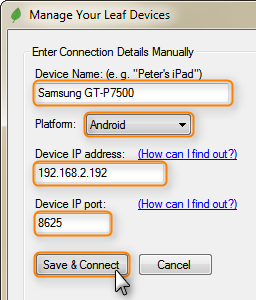
Enter the connection details manually
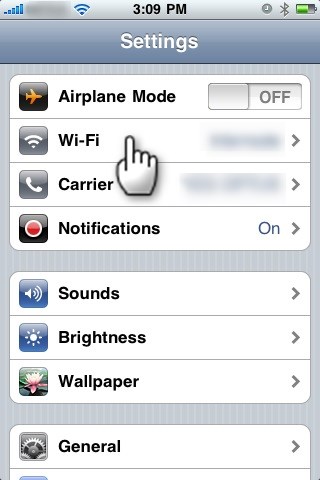
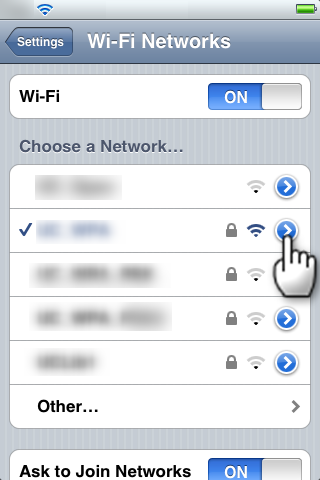
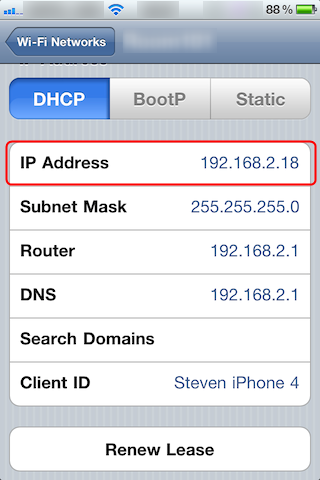
Find the connections details - on your iPhone or iPad
If you own an iPhone or iPad, you find your device's local IP address this way (the port is always 8625):Search and tap on the 'Settings' app. Then tap on "Wi-Fi":
Find the connections details - on your Android device
For binary Leaf for Android you simply tap on the Option Menu button. It is either located in the lower left, or as a hardware button. The appearing menu shows the connections details with the local IP address and port: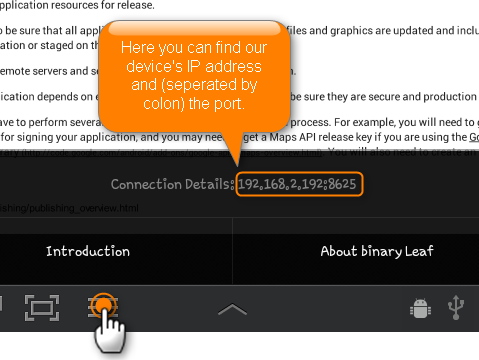
Open the binary Leaf settings
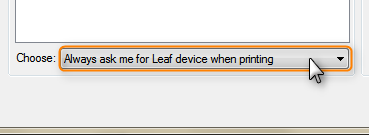
Now open the binary Leaf settings that brings up a window named 'Manage Your Leaf Devices'.On the lower left you can choose the device selection mode:
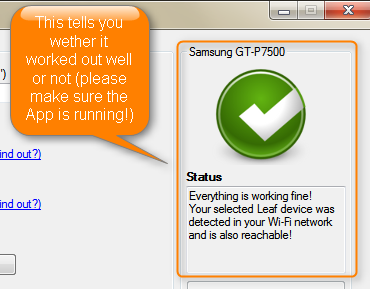
If everything is OK, you see something like this:
Last option is to drop us a note with a detailed problem description. We will try to help you. Thanks!
© binarypeople GbR 2012 · Imprint · Terms Of Use · Privacy Policy